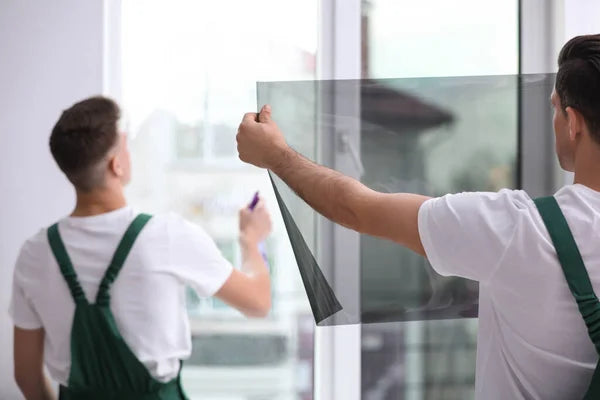
How to Apply Window Film Like a Pro
Applying window film can be a cost-effective way to enhance your home’s comfort, privacy, and aesthetics. Whether you want to reduce glare, block harmful UV rays, or simply add a decorative touch, knowing how to apply window film properly is essential for achieving professional-looking results. In this comprehensive guide, we will walk you through the steps to apply window film like a pro, ensuring that you can enjoy all the benefits it offers.
Why Choose Window Film?
Before diving into the application process, let’s briefly explore why window film is an excellent choice for homeowners and business owners alike:
- Energy Efficiency: Window film can help regulate indoor temperatures, reducing the need for heating and cooling.
- UV Protection: It blocks up to 99% of harmful UV rays, protecting your furniture and flooring from fading.
- Enhanced Privacy: Tinted films provide privacy during the day while allowing natural light to filter in.
- Glare Reduction: Window film can significantly reduce glare, making it easier to enjoy your space, especially for screen use.
Tools and Materials You’ll Need
To apply window film like a pro, gather the following tools and materials:
- Window Film: Choose the right type and shade for your needs (reflective, frosted, or decorative).
- Spray Bottle: Fill it with a mixture of water and a few drops of dish soap. This will help you position the film correctly.
- Squeegee: A plastic squeegee will help you smooth out air bubbles and excess water.
- Utility Knife or Straight Edge: For trimming excess film.
- Measuring Tape: To ensure accurate measurements.
- Clean Cloth or Paper Towels: For cleaning the window surface.
- Ruler: To measure and cut the film accurately.
Step-by-Step Guide to Applying Window Film
1. Choose the Right Film
Before you begin, make sure you select the appropriate window film for your specific needs. Consider factors such as privacy, heat reduction, and aesthetics. Once you’ve made your choice, measure the window to determine how much film you’ll need.
2. Prepare the Window Surface
Proper preparation is key to achieving a smooth application:
- Clean the Window: Use a glass cleaner and a lint-free cloth to thoroughly clean the window. Make sure to remove any dust, dirt, or residue, as these can affect the adhesion of the film.
- Dry the Window: Ensure the window is completely dry before applying the film.
3. Measure and Cut the Film
Using a measuring tape, measure the dimensions of the window. It’s advisable to cut the film slightly larger than the window to ensure complete coverage.
- Cut the Film: Lay the film on a flat surface and use a utility knife or straight edge to cut it to size. Remember to leave an extra half-inch around the edges for trimming later.
4. Wet the Window and the Film
Before applying the film, wet both the window and the adhesive side of the film:
- Spray the Window: Use your spray bottle filled with soapy water to generously spray the window surface.
- Wet the Film: Lightly mist the adhesive side of the film with the soapy water mixture. This will help you position the film without it sticking immediately.
5. Position the Film
Carefully position the film against the window:
- Align the Film: Start at the top of the window and align the film with the edges. The soapy water will allow you to reposition the film if necessary.
- Press the Film in Place: Once you have it in the correct position, press the film against the window gently to adhere it.
6. Squeegee Out Air Bubbles
Using a plastic squeegee, begin smoothing out the film:
- Work from the Center Out: Start at the center of the film and work your way outward to push out any air bubbles and excess water.
- Be Gentle but Firm: Apply even pressure as you move the squeegee to avoid damaging the film.
7. Trim the Excess Film
Once the film is applied and all air bubbles have been smoothed out, it’s time to trim the excess:
- Use a Utility Knife: Carefully trim the edges of the film along the window frame for a clean finish. A straight edge can help guide your cuts for accuracy.
8. Final Touches
After trimming, inspect your work:
- Remove Any Remaining Bubbles: If you notice any stubborn air bubbles, use the squeegee to work them out.
- Allow to Cure: Let the film cure for at least 24 hours before exposing it to water or cleaning products. This ensures proper adhesion.
Tips for Success
- Choose the Right Time: For best results, apply window film on a cloudy day or when the temperature is moderate. Extreme heat or direct sunlight can make the application process more challenging.
- Practice Patience: Take your time during the application process. Rushing can lead to mistakes and a less-than-perfect finish.
- Seek Help if Needed: If you have large windows or find the application process daunting, consider enlisting a friend or family member to assist you.
Conclusion
Applying window film like a pro is achievable with the right tools, techniques, and a bit of patience. By following these steps, you can enjoy the many benefits of window film, from enhanced privacy to energy efficiency.
If you’re looking for high-quality window film options and professional installation, the team at Window Tint Company is here to help. We offer a range of solutions tailored to your needs, ensuring that you get the perfect fit for your home or office.
📞 Call us at: +44 7395 009 701
📧 Email: info@windowtintcompany.co.uk
🌐 Visit our website: www.windowtintcompany.co.uk
